
Branches
A branch is a place your business operates from - a shop, a warehouse-and-counter, a dark kitchen, a depot. It is the most important scoping dimension in OSOSS: stock is held per branch, sales are attributed per branch, working hours and delivery zones are set per branch, and the accounts a sale posts to can differ per branch.
Menu path: Inventories > Branches
URL: https://my.ososs.com/dashboard/pos/branches
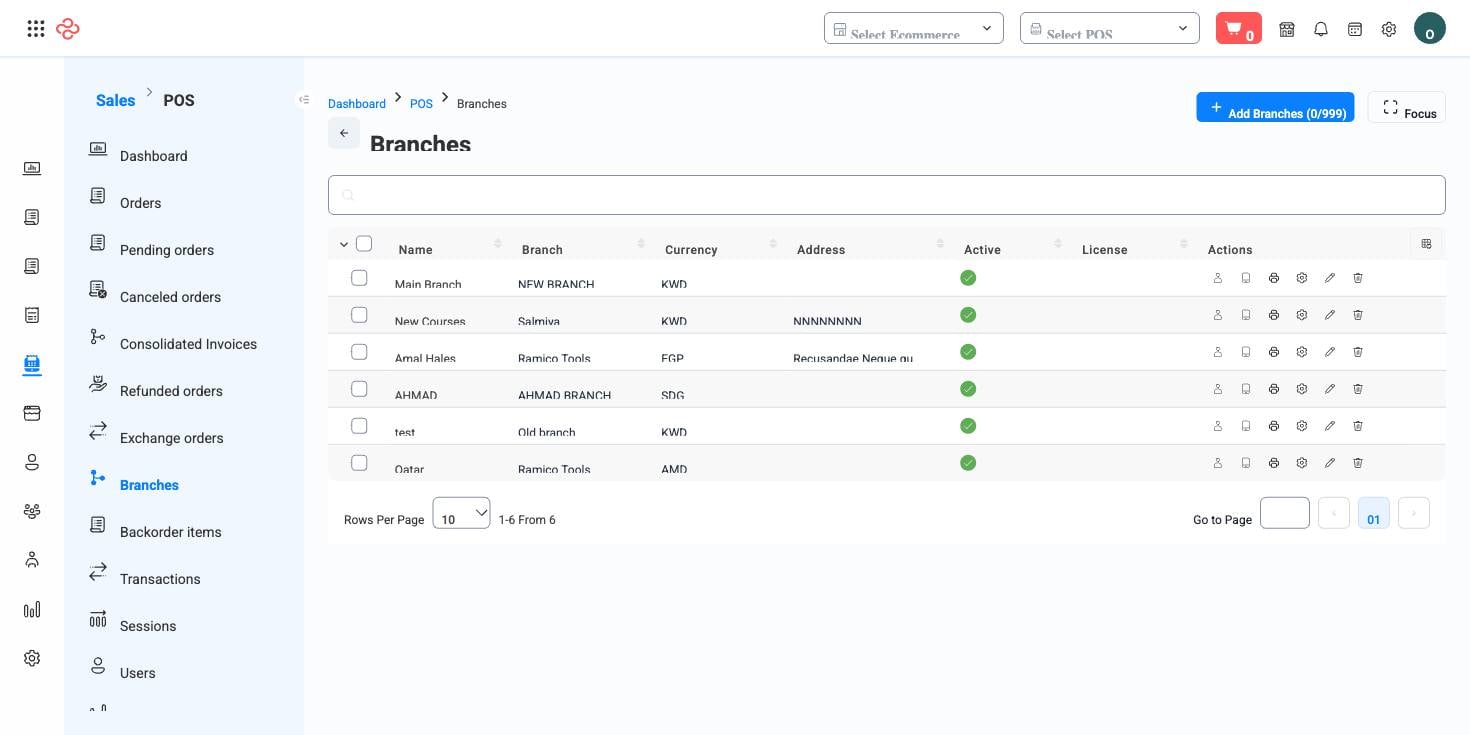
What a branch defines
The branch form is organised into tabs, and each tab controls a different part of the business.
| Tab | What it sets |
|---|---|
| General | Name, active state, mobile number, address with country, city and area, map location, branch image, whether backorders are allowed, the lead time before an order can be collected, and whether a delivery date may be set on pickup orders |
| Currencies | The base currency, the other currencies this branch accepts, and whether live exchange-rate conversion is used |
| Just-in-time manufacturing | Whether the branch produces on demand, which inventories it produces from, whether availability is checked before accepting, and whether the production order completes automatically |
| Working days | Opening hours per day, with a default set you can apply and then override where a day differs |
| Zones | The delivery zones this branch serves, which is what decides whether a customer's address can be served from here at all |
| Accounting | The income, expense, asset, sales discount, sales return and sales tax accounts this branch posts to |
The accounting tab is the one that quietly matters most. Set per branch, it lets a group of shops share one chart of accounts while still reporting revenue and returns separately - and it is read at the moment a sale posts, so changing it does not restate history.
Add a branch
- Fill the General tab: name, address, contact number and map location. The address feeds delivery, the map location feeds the pickup directions your customers see.
- Set the currency behaviour if the branch takes more than one currency.
- Enter the working days. Anything outside these hours is closed to online ordering for this branch.
- Attach the delivery zones this branch covers, and set Time before order so customers are not promised a collection you cannot make.
- Choose the accounting accounts, then save.
- If the branch sells at a register, complete its POS configuration under POS Branches and its devices under Devices.
Full reference
Every option and control on this page, at a glance.
Form fields (26)
Address, Area ID, Asset account ID, Autocomplete jit order, Base currency ID, Can set delivery date on pickup, Check quantity availability, City ID, Country ID, Days, Days - default working hours - active, Enable jit production, Enable real time currencies converter, Expense account ID, Image url, Income account ID, Map location, Mobile, Name, Production inventories, Sales discount account ID, Sales return account ID, Sales tax account ID, Supported currencies, Time before order, Zones
Standard list tools
Every list page in OSOSS shares these controls:
- Manage columns - the icon at the right edge of the header row: search columns, tick to show or hide, drag to reorder. Your selection persists for your user.
- Quick search - matches the page's primary field.
- Filter chips + More Filters - the chips are your defaults; More Filters exposes the full set below.
- Save Filter / Saved Filters - name a filter combination and recall it in one click; one can be your default view.
- Reset - clears filters back to defaults.
- Export All - downloads the current filtered rows with exactly the columns you have selected.
- Focus - hides the surrounding chrome for a full-width table.
- Row selection - the header checkbox selects the page or all matching rows, enabling bulk actions.
- Rows per page and page jumper - at the foot of the table.
- Custom fields - anything you define under Settings > Custom Fields appears here as both a column and a filter.
Related pages
- Inventories - the stock locations that sit inside branches
- POS Branches - register configuration on top of a branch
- Delivery and Pickup - the fee rules that use branch zones
What you can do on this page
Every action on this page, step by step. What you see depends on your role, so a control your account is not set up for simply does not appear.
Add a record
- Click Add above the table - some pages label it New or show a + icon.
- Complete the form. Required fields carry a red asterisk and the form will not submit until they are filled.
- Click Save. Validation runs on submit; any field that fails shows its message directly beneath itself, and the form scrolls to the first problem.
- You land back on the list with the new record in place.
This form carries 26 fields, grouped into sections and tabs so you meet them a few at a time. Only the required ones block saving - fill those, save, then come back and enrich the record. Every field is listed under Form fields in the reference below.
Edit a record
- Open the row's actions menu at the end of the row and choose Edit, or open the record and use Edit there.
- The form loads with current values. Change only what you need.
- Click Save.
Open and read a record
- Click the row, or choose View in the row's actions menu.
- The detail page shows the record's own fields, its related documents, and the actions that apply to it in its current state.
- Use the breadcrumb or your browser's back button to return - your filters, sort, and page position are preserved.
Export the list
- Filter and choose your columns first - the export mirrors exactly what is on screen, not the whole table.
- Click Export All.
- The file downloads as a spreadsheet: one row per record, your visible columns in your order.