
Customer Groups
A customer group is a segment of customers that the system treats the same way - retail walk-ins, wholesale buyers, VIPs, staff. Groups do double duty in OSOSS: they organize your customers commercially, and they tell the accounting engine which ledger accounts each segment's sales should post to.
Menu path: Sales > Customers > Customer Groups
URL: https://my.ososs.com/dashboard/customer-company-groups
How customer groups work
Every customer belongs to a group (one group is marked default and catches everyone not explicitly assigned). When an invoice is issued, OSOSS looks at the customer's group to decide where the money lands in your chart of accounts:
| Field | What it controls |
|---|---|
| Name | The group's label, shown on customer records and filters |
| Active | Whether the group can be assigned to customers |
| Default | The fallback group for new and unassigned customers |
| Sales account | Ledger account that receives this group's revenue |
| Sales discount account | Where discounts given to this group are posted |
| Sales return account | Where this group's refunds and returns post |
| Sales tax / tax account | Where tax collected from this group accumulates |
| Cost of goods account | The COGS account used for this group's sales |
This per-group accounting mapping is what lets your income statement separate wholesale revenue from retail revenue automatically - no manual journal work, just correct group assignment on each customer.
Create a customer group
- Go to Sales > Customers > Customer Groups and press Create.
- Name the group and keep Active on.
- Optionally pick the sales, discount, return, tax, and cost-of-goods accounts for the segment - or leave them empty to use the defaults.
- Mark one group as Default if this should be where unassigned customers land.
- Save - the group appears in the list immediately and becomes selectable on customer records.
Then assign customers to the group from Sales > Customers > Customers (the group field on the customer form).
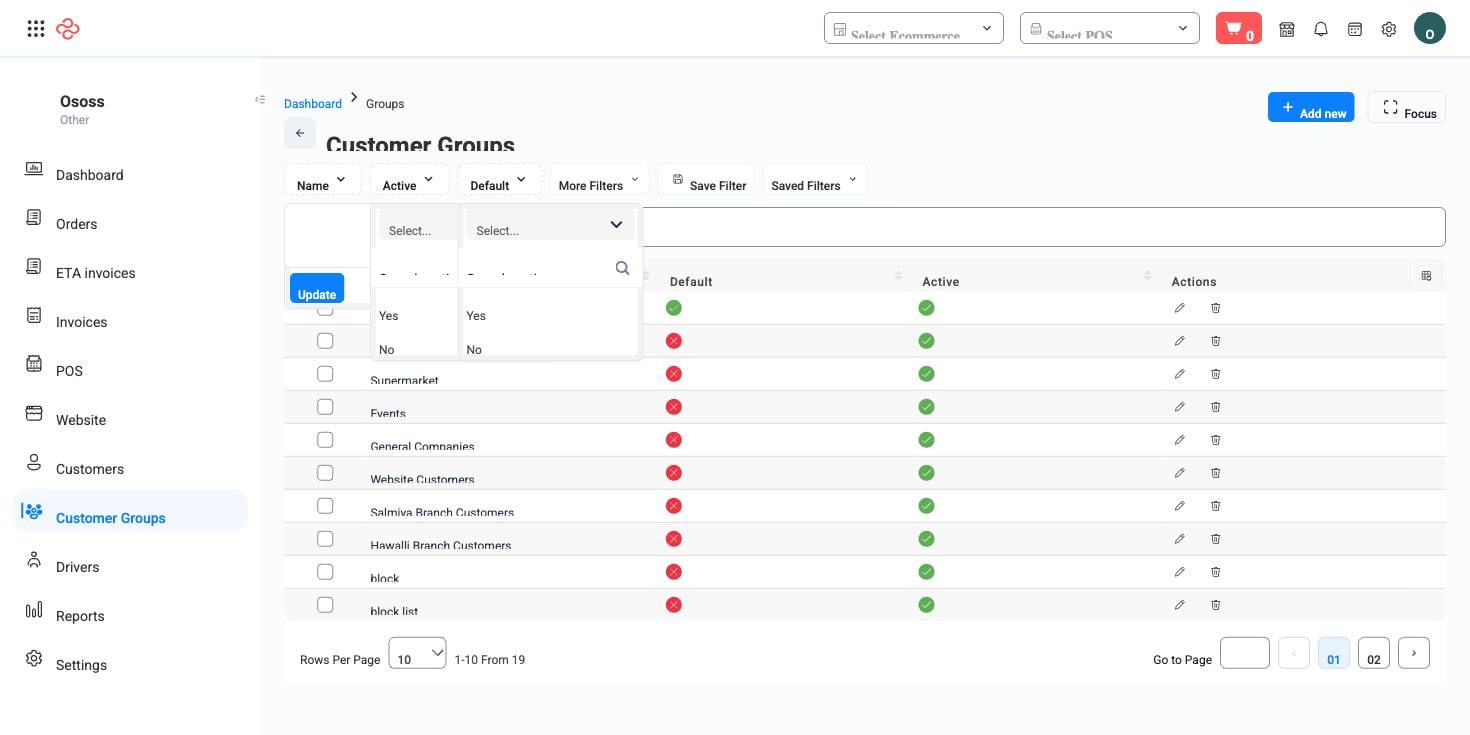
Reading the list
The standard tools apply: manage columns (icon at the right of the header row), saved filters, Export All, focus mode, rows-per-page, and a page jumper. Seven filters - active, default, name, and each of the account mappings - let you audit which groups post where. Custom fields you define under Settings > Custom Fields appear automatically as extra filters.
Export the current view
- Apply your filters and select the columns you want (manage columns).
- Press Export All - the export respects current filters and column selection.
What you can do on this page
Every action on this page, step by step. What you see depends on your role, so a control your account is not set up for simply does not appear.
Add a record
- Click Add above the table - some pages label it New or show a + icon.
- Complete the form. Required fields carry a red asterisk and the form will not submit until they are filled.
- Click Save. Validation runs on submit; any field that fails shows its message directly beneath itself, and the form scrolls to the first problem.
- You land back on the list with the new record in place.
Fields on this form: Active, Cost of goods account ID, Default, Name, Sales account ID, Sales discount account ID, Sales return account ID, Sales tax account ID, Tax account ID
Edit a record
- Open the row's actions menu at the end of the row and choose Edit, or open the record and use Edit there.
- The form loads with current values. Change only what you need.
- Click Save.
Export the list
- Filter and choose your columns first - the export mirrors exactly what is on screen, not the whole table.
- Click Export All.
- The file downloads as a spreadsheet: one row per record, your visible columns in your order.
Full reference
Every option and control on this page, at a glance.
Filters (7)
- Identity and numbering: Cost of goods account ID, Sales account ID, Sales discount account ID, Tax account ID
- Status and flags: Active
- Other: Default, Name
Form fields (9)
Active, Cost of goods account ID, Default, Name, Sales account ID, Sales discount account ID, Sales return account ID, Sales tax account ID, Tax account ID
Standard list tools
Every list page in OSOSS shares these controls:
- Manage columns - the icon at the right edge of the header row: search columns, tick to show or hide, drag to reorder. Your selection persists for your user.
- Quick search - matches the page's primary field.
- Filter chips + More Filters - the chips are your defaults; More Filters exposes the full set below.
- Save Filter / Saved Filters - name a filter combination and recall it in one click; one can be your default view.
- Reset - clears filters back to defaults.
- Export All - downloads the current filtered rows with exactly the columns you have selected.
- Focus - hides the surrounding chrome for a full-width table.
- Row selection - the header checkbox selects the page or all matching rows, enabling bulk actions.
- Rows per page and page jumper - at the foot of the table.
- Custom fields - anything you define under Settings > Custom Fields appears here as both a column and a filter.