
Customers
The customer record is the thread that ties your business together. Every invoice, order, payment, loyalty point, and delivery address hangs off a customer, so a clean customer list means accurate statements, working notifications, and reports you can trust. This screen is your master directory of everyone you sell to.
Menu path: Sales > Customers > Customers
URL: https://my.ososs.com/dashboard/customers
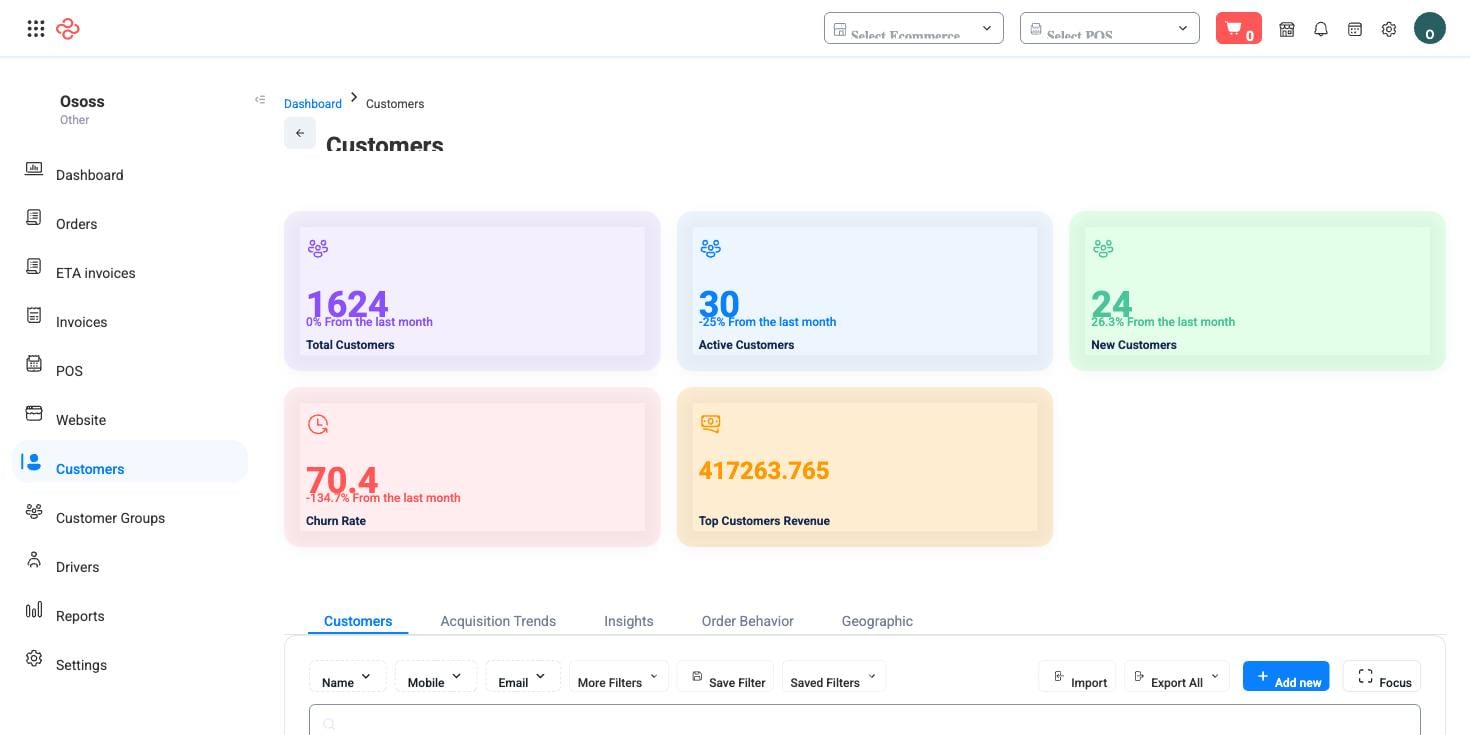
How customer records work
Customers enter OSOSS from every direction: a cashier adds one at the POS, a shopper registers on your website, or you create one here manually. However they arrive, they all live in this single list. Each record can carry:
| Field group | Fields |
|---|---|
| Identity | Name, email, mobile, phone |
| Address | Country, city, area, address, address name |
| Commercial | Customer group, currency, preferred language |
| Flags | Default customer, is vendor (link to a vendor record) |
The group assignment matters most commercially - it connects the customer to group-level pricing and to the accounting mapping defined in Customer Groups. The language setting controls whether the customer receives invoices and notifications in Arabic or English. Marking a record is vendor links it to a vendor, useful when the same party both buys from you and supplies you.
Add a customer
- Go to Sales > Customers > Customers and press Create.
- Enter the name and at least one way to reach the customer - mobile is what the POS uses to find them at the register.
- Set the country, city, and area if you deliver; these drive shipping zones and fees.
- Choose a customer group and, for foreign-currency clients, the currency.
- Save - the new record appears in the list immediately and is instantly searchable at the POS and on new invoices.
Find and manage customers
The quick search box finds customers fast, and the default columns - name, company sequence ID, email, mobile, children count - identify a record at a glance. All the standard tools apply: manage columns (icon at the right of the header row), saved filters, Export All, focus mode, rows-per-page, and a page jumper.
Open any customer to see their full profile and history. To remove one:
- Select the row(s) or open the row menu.
- Choose Delete and confirm.
Export the current view
- Apply your filters and select the columns you want (manage columns).
- Press Export All - the export respects current filters and column selection. This doubles as your mailing-list extract for campaigns.
What you can do on this page
Every action on this page, step by step. What you see depends on your role, so a control your account is not set up for simply does not appear.
Add a record
- Click Add above the table - some pages label it New or show a + icon.
- Complete the form. Required fields carry a red asterisk and the form will not submit until they are filled.
- Click Save. Validation runs on submit; any field that fails shows its message directly beneath itself, and the form scrolls to the first problem.
- You land back on the list with the new record in place.
Fields on this form: Address, Address name, Area ID, City ID, Country ID, Currency ID, Email, Group ID, Is default, Is vendor, Lang, Mobile, Name, Phone, Vendor ID
Edit a record
- Open the row's actions menu at the end of the row and choose Edit, or open the record and use Edit there.
- The form loads with current values. Change only what you need.
- Click Save.
Open and read a record
- Click the row, or choose View in the row's actions menu.
- The detail page shows the record's own fields, its related documents, and the actions that apply to it in its current state.
- Use the breadcrumb or your browser's back button to return - your filters, sort, and page position are preserved.
Delete a record
- Open the row's actions menu and choose Delete.
- Confirm in the dialog. There is no undo from the interface.
- If the record is referenced elsewhere - used on a document, tied to a transaction - the delete is refused and the reason shown.
Actions on a single record
These appear in the row's actions menu and on the record page, and only when the record's current state allows them:
- Delete - removes the record, subject to the reference check above.
Export the list
- Filter and choose your columns first - the export mirrors exactly what is on screen, not the whole table.
- Click Export All.
- The file downloads as a spreadsheet: one row per record, your visible columns in your order.
Full reference
Every option and control on this page, at a glance.
List columns
Shown by default: Name, Company sequence ID, Email, Mobile, Children count
Also available: Account code, Account number, Avatar, Can add children, Created at, Currency, Group name, Has appointments, Has consultations, Has invoices, ID, Invoices count, Is folder, Parent, Parent name, Store, Tree name, VAT number
Expandable column groups: Addresses - Each group expands to its own sub-columns in the manage-columns dialog.
Form fields (15)
Address, Address name, Area ID, City ID, Country ID, Currency ID, Email, Group ID, Is default, Is vendor, Lang, Mobile, Name, Phone, Vendor ID
Record actions
- Delete
Standard list tools
Every list page in OSOSS shares these controls:
- Manage columns - the icon at the right edge of the header row: search columns, tick to show or hide, drag to reorder. Your selection persists for your user.
- Quick search - matches the page's primary field.
- Filter chips + More Filters - the chips are your defaults; More Filters exposes the full set below.
- Save Filter / Saved Filters - name a filter combination and recall it in one click; one can be your default view.
- Reset - clears filters back to defaults.
- Export All - downloads the current filtered rows with exactly the columns you have selected.
- Focus - hides the surrounding chrome for a full-width table.
- Row selection - the header checkbox selects the page or all matching rows, enabling bulk actions.
- Rows per page and page jumper - at the foot of the table.
- Custom fields - anything you define under Settings > Custom Fields appears here as both a column and a filter.