
Coupons
Coupons are discount codes your customers redeem at checkout - the workhorse of online promotions. In OSOSS you control not just the discount itself but exactly who can use it, on what, where, and how many times, so a campaign code cannot leak beyond the audience you built it for.
Menu path: Sales > Website > Coupons
URL: https://my.ososs.com/dashboard/coupons
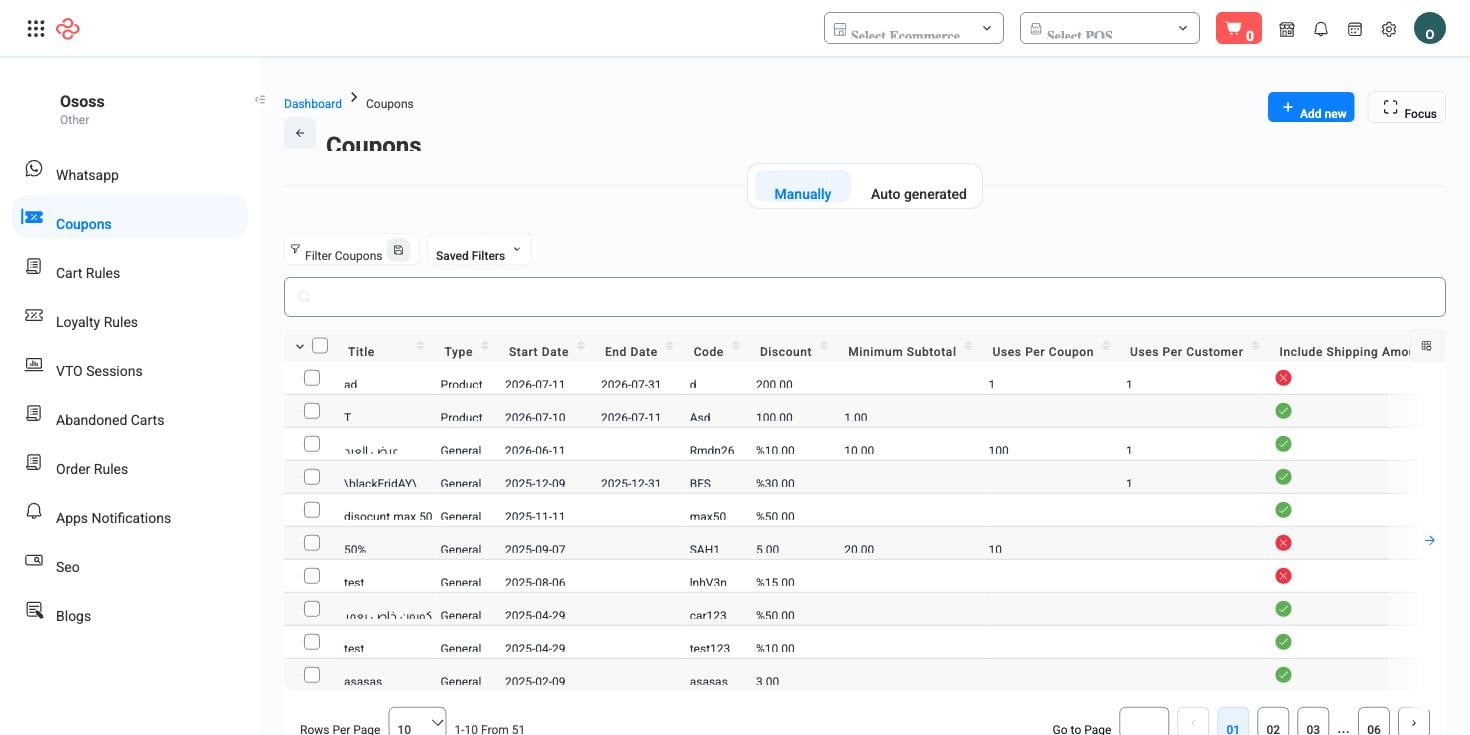
How coupons work
A coupon combines three decisions: what the discount is, who qualifies, and how long it runs. At checkout, OSOSS checks every condition - dates, minimum subtotal, customer group, products, payment method, sales channel - and only applies the discount when all of them pass. A coupon can also be set to auto apply in store, so qualifying customers get the discount without typing anything.
| Setting group | Fields |
|---|---|
| Identity | Title, code, description, active, type |
| Discount | Discount type, amount, price type, include shipping amount |
| Validity | Start date, end date, uses per coupon, uses per customer |
| Audience | Customers, customer groups, update on old customer |
| Scope | Product IDs, category IDs, minimum subtotal, sales channels, payment methods |
| Geography and currency | Countries, currencies, price zones |
| Behavior | Auto apply in store, auto generated |
Create a coupon
- Go to Sales > Website > Coupons and press Create.
- Give it a title, a code (what the customer types), and a description. Fields marked with * are required.
- Choose the discount type and amount, and decide whether shipping is included in the discount.
- Set the start and end dates, plus the uses-per-coupon and uses-per-customer limits.
- Narrow the scope as needed: specific products or categories, a minimum subtotal, customer groups, payment methods, sales channels, countries, currencies, or price zones. Leave a restriction empty to keep it open.
- Mark it Active and save - the coupon works on the storefront immediately.
Track coupon performance
Opening a coupon shows the orders it produced. The list columns - invoice date, order number, customer, discount, amount, gateway, shipping method - let you read each redemption: who used the code, how much discount it granted, and what the order was worth.
Eight filters narrow the list: title, code, type, price type, start date, end date, auto apply in store, and auto generated. Custom fields you define under Settings > Custom Fields appear here automatically as extra filters.
Export the current view
- Apply your filters and select the columns you want (manage columns - the icon at the right of the header row).
- Press Export All - the export respects your current filters and column selection. Filter by a campaign's code and date range to hand marketing a clean redemption report.
What you can do on this page
Every action on this page, step by step. What you see depends on your role, so a control your account is not set up for simply does not appear.
Add a record
- Click Add above the table - some pages label it New or show a + icon.
- Complete the form. Required fields carry a red asterisk and the form will not submit until they are filled.
- Click Save. Validation runs on submit; any field that fails shows its message directly beneath itself, and the form scrolls to the first problem.
- You land back on the list with the new record in place.
This form carries 25 fields, grouped into sections and tabs so you meet them a few at a time. Only the required ones block saving - fill those, save, then come back and enrich the record. Every field is listed under Form fields in the reference below.
Edit a record
- Open the row's actions menu at the end of the row and choose Edit, or open the record and use Edit there.
- The form loads with current values. Change only what you need.
- Click Save.
Open and read a record
- Click the row, or choose View in the row's actions menu.
- The detail page shows the record's own fields, its related documents, and the actions that apply to it in its current state.
- Use the breadcrumb or your browser's back button to return - your filters, sort, and page position are preserved.
Export the list
- Filter and choose your columns first - the export mirrors exactly what is on screen, not the whole table.
- Click Export All.
- The file downloads as a spreadsheet: one row per record, your visible columns in your order.
Full reference
Every option and control on this page, at a glance.
List columns
Shown by default: Invoice date, Format number, Customer, Discount, Amount, Incomes - gateway, Shipping method
Filters (8)
- Identity and numbering: Code
- Dates and periods: Auto apply in store, Auto generated, End date, Start date
- Money and payment: Price type
- Status and flags: Type
- Other: Title
Form fields (25)
Active, Amount, Auto apply in store, Category ids, Code, Countries, Currencies, Customer groups, Customers, Description, Discount type, End date, Include shipping amount, Minimum subtotal, Payment methods, Price type, Price zones, Product ids, Sales channels, Start date, Title, Type, Update on old customer, Uses per coupon, Uses per customer
Standard list tools
Every list page in OSOSS shares these controls:
- Manage columns - the icon at the right edge of the header row: search columns, tick to show or hide, drag to reorder. Your selection persists for your user.
- Quick search - matches the page's primary field.
- Filter chips + More Filters - the chips are your defaults; More Filters exposes the full set below.
- Save Filter / Saved Filters - name a filter combination and recall it in one click; one can be your default view.
- Reset - clears filters back to defaults.
- Export All - downloads the current filtered rows with exactly the columns you have selected.
- Focus - hides the surrounding chrome for a full-width table.
- Row selection - the header checkbox selects the page or all matching rows, enabling bulk actions.
- Rows per page and page jumper - at the foot of the table.
- Custom fields - anything you define under Settings > Custom Fields appears here as both a column and a filter.