
Manufacturing Orders
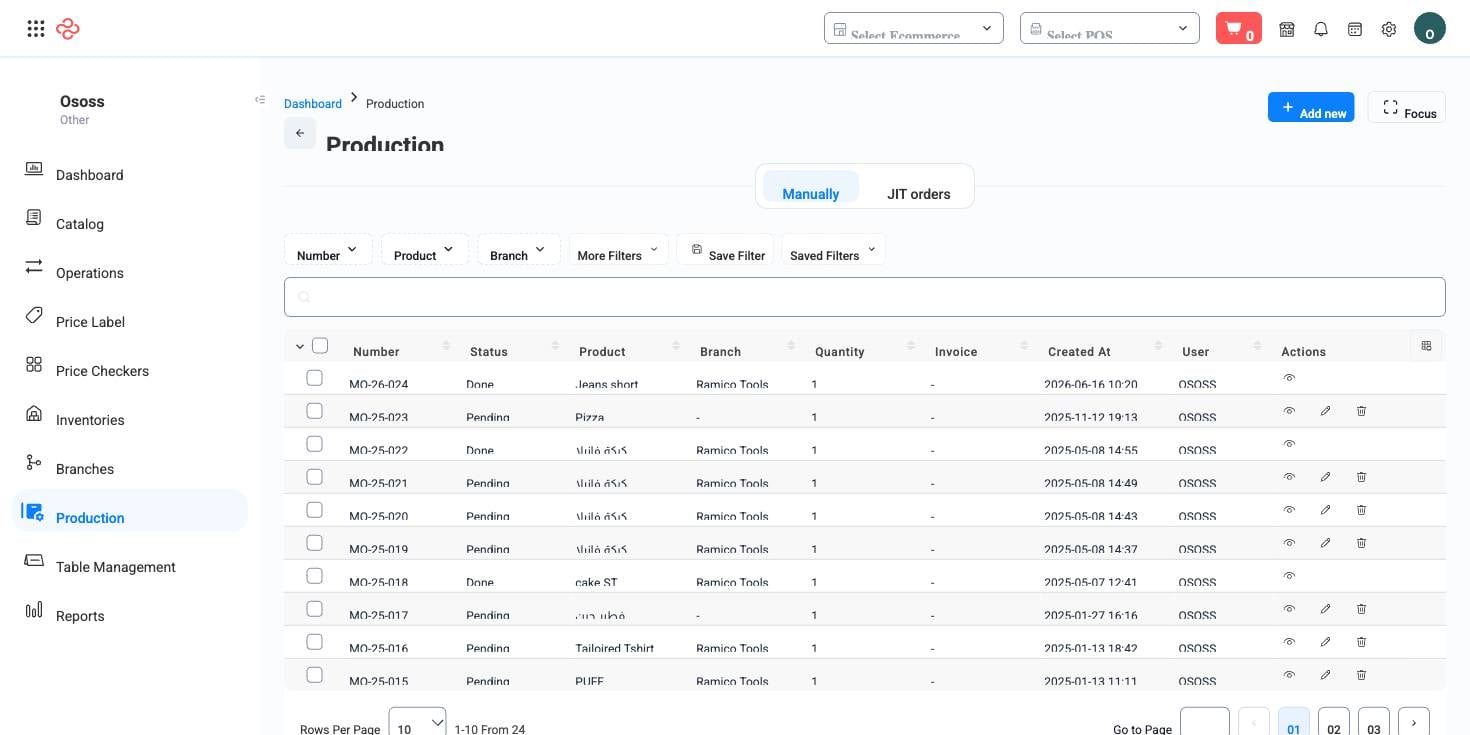
A manufacturing order turns components into a finished product. You state what to make, how much, and where - OSOSS consumes the recipe's ingredients and adds the finished quantity to stock.
Menu path: Inventories > Manufacturing Orders
Before you start
Manufacturing only works if the product has a recipe. Define its components under Ingredients first: each component, the quantity consumed per unit, its unit, and the wastage percentage. The manufacturing order simply executes that recipe at the scale you choose.
What an order records
| Field | Meaning |
|---|---|
| Product | The finished item to produce |
| Quantity | How many units to make |
| Branch | Where production happens |
| Quantities branch | The location whose stock the components are drawn from |
| Invoice | The sale that triggered production, when it was made to order |
| Status | Where the order stands in production |
| User | Who raised it |
The link to an invoice is what makes made-to-order work: a sale can generate its own production order, so the kitchen or workshop sees exactly what a customer has paid for rather than a general instruction to produce.
Branches can also produce automatically. In the branch's just-in-time settings you can enable production on demand, choose which inventories it draws from, require an availability check before accepting, and let the resulting order complete itself - see Branches.
Produce a batch
- Create the order, choose the Product and the Quantity to make.
- Set the branch producing and the location the components come from. These are often the same, but a central kitchen supplying several shops is exactly why they can differ.
- Save. The components are consumed and the finished quantity is added when the order completes.
- Check the result: finished stock on Inventories, component movements in Stock Transactions.
Full reference
Every option and control on this page, at a glance.
Form fields (6)
Branch ID, Items, Product ID, Quantities, Quantities branch ID, Quantities quantity
Standard list tools
Every list page in OSOSS shares these controls:
- Manage columns - the icon at the right edge of the header row: search columns, tick to show or hide, drag to reorder. Your selection persists for your user.
- Quick search - matches the page's primary field.
- Filter chips + More Filters - the chips are your defaults; More Filters exposes the full set below.
- Save Filter / Saved Filters - name a filter combination and recall it in one click; one can be your default view.
- Reset - clears filters back to defaults.
- Export All - downloads the current filtered rows with exactly the columns you have selected.
- Focus - hides the surrounding chrome for a full-width table.
- Row selection - the header checkbox selects the page or all matching rows, enabling bulk actions.
- Rows per page and page jumper - at the foot of the table.
- Custom fields - anything you define under Settings > Custom Fields appears here as both a column and a filter.
Related pages
- Ingredients - the recipe production consumes
- Backorder Ingredients - components consumed beyond stock
- Branches - just-in-time production settings
What you can do on this page
Every action on this page, step by step. What you see depends on your role, so a control your account is not set up for simply does not appear.
Add a record
- Click Add above the table - some pages label it New or show a + icon.
- Complete the form. Required fields carry a red asterisk and the form will not submit until they are filled.
- Click Save. Validation runs on submit; any field that fails shows its message directly beneath itself, and the form scrolls to the first problem.
- You land back on the list with the new record in place.
Fields on this form: Branch ID, Items, Product ID, Quantities, Quantities branch ID, Quantities quantity
Edit a record
- Open the row's actions menu at the end of the row and choose Edit, or open the record and use Edit there.
- The form loads with current values. Change only what you need.
- Click Save.
Open and read a record
- Click the row, or choose View in the row's actions menu.
- The detail page shows the record's own fields, its related documents, and the actions that apply to it in its current state.
- Use the breadcrumb or your browser's back button to return - your filters, sort, and page position are preserved.
Delete a record
- Open the row's actions menu and choose Delete.
- Confirm in the dialog. There is no undo from the interface.
- If the record is referenced elsewhere - used on a document, tied to a transaction - the delete is refused and the reason shown.
Export the list
- Filter and choose your columns first - the export mirrors exactly what is on screen, not the whole table.
- Click Export All.
- The file downloads as a spreadsheet: one row per record, your visible columns in your order.