
Journal Types
A journal type is a named book of account. Instead of one undifferentiated stream of entries, you keep a sales journal, a purchases journal, a cash journal, and a general journal - each with its own numbering sequence and each filterable on its own. Accountants review one book at a time, and this page is what makes that possible.
Menu path: Accounting > Journal Types
URL: https://my.ososs.com/dashboard/journal-types
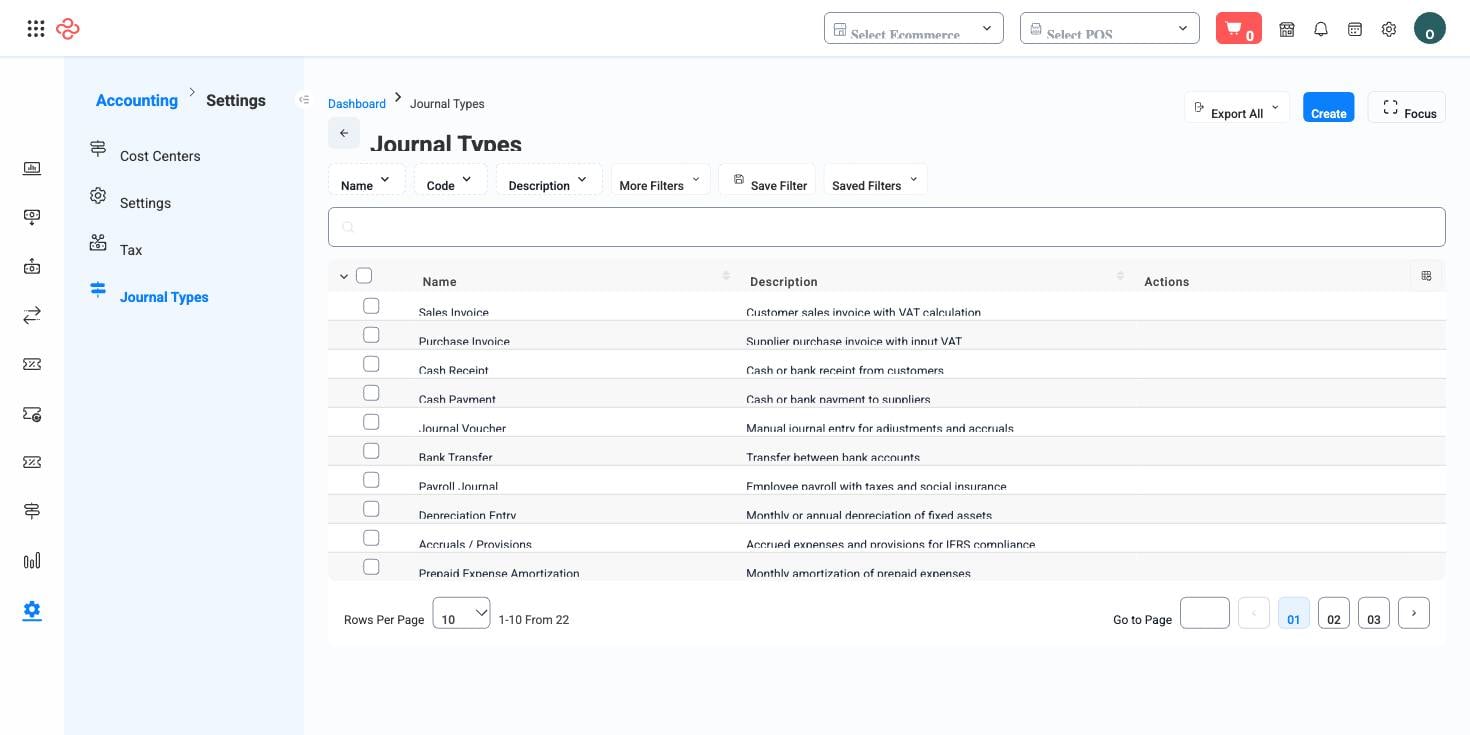
How journal types work in OSOSS
A journal type is four fields: a bilingual Name, a short Code, a bilingual Description, and an Active switch. The code carries more weight than its size suggests:
| Rule | Detail |
|---|---|
| Length | Two to four characters |
| Characters | Letters only, no digits or symbols |
| Case | Stored uppercase, whatever you type |
| Uniqueness | Unique within your company |
Every account has a numbering sequence tied to its journal type. When you create a Voucher and choose the type, OSOSS looks up the next free number for that type - so your cash journal and your general journal each run from 1 without colliding. Leave the type empty on a voucher and it falls into the default JV journal, which is why JV exists in every account and why you should not repurpose it.
Journal types also drive reading. The type appears as a column on both the voucher list and Journal Entries, and as a filter on both, so "show me only the cash book for March" is two clicks.
Before you start
Ask your accountant which books their review process expects before you create anything. Matching their conventions here costs five minutes; discovering the mismatch at year end costs their billable hours.
Add a journal type
- Click the create button. The form opens in a side panel, so the list stays where it is.
- Enter the Name in both languages - it is what appears in every dropdown and column.
- Enter a Code of two to four letters. Use something obvious: SJ for sales, PJ for purchases, CJ for cash.
- Add a Description explaining what belongs in this book. Six months from now, someone else will need it.
- Leave Active on, then save.
Editing and retiring
The pencil action on a row opens the same form pre-filled, again in a side panel. Names and descriptions are safe to change at any time - existing entries follow the new label. Changing the code is the one to be careful with, because the code is what your exports and your accountant's papers refer to.
To stop a type being used, edit it and switch Active off. It vanishes from the type dropdowns while every entry already filed under it keeps reporting, and the filter still finds them. That is almost always better than deleting, which is refused for any type that already has entries behind it.
Full reference
Every option and control on this page, at a glance.
Filters (4)
- Identity and numbering: Code
- Status and flags: Active
- Other: Description, Name
Form fields (4)
Active, Code, Description, Name
Standard list tools
Every list page in OSOSS shares these controls:
- Manage columns - the icon at the right edge of the header row: search columns, tick to show or hide, drag to reorder. Your selection persists for your user.
- Quick search - matches the page's primary field.
- Filter chips + More Filters - the chips are your defaults; More Filters exposes the full set below.
- Save Filter / Saved Filters - name a filter combination and recall it in one click; one can be your default view.
- Reset - clears filters back to defaults.
- Export All - downloads the current filtered rows with exactly the columns you have selected.
- Focus - hides the surrounding chrome for a full-width table.
- Row selection - the header checkbox selects the page or all matching rows, enabling bulk actions.
- Rows per page and page jumper - at the foot of the table.
- Custom fields - anything you define under Settings > Custom Fields appears here as both a column and a filter.
Related pages
- Vouchers - where you choose the type and draw its next number
- Journal Entries - filter the ledger down to one book
- Chart of Accounts - the accounts those books post to
What you can do on this page
Every action on this page, step by step. What you see depends on your role, so a control your account is not set up for simply does not appear.
Add a record
- Click Add above the table - some pages label it New or show a + icon.
- Complete the form. Required fields carry a red asterisk and the form will not submit until they are filled.
- Click Save. Validation runs on submit; any field that fails shows its message directly beneath itself, and the form scrolls to the first problem.
- You land back on the list with the new record in place.
Fields on this form: Active, Code, Description, Name
Edit a record
- Open the row's actions menu at the end of the row and choose Edit, or open the record and use Edit there.
- The form loads with current values. Change only what you need.
- Click Save.
Open and read a record
- Click the row, or choose View in the row's actions menu.
- The detail page shows the record's own fields, its related documents, and the actions that apply to it in its current state.
- Use the breadcrumb or your browser's back button to return - your filters, sort, and page position are preserved.
Export the list
- Filter and choose your columns first - the export mirrors exactly what is on screen, not the whole table.
- Click Export All.
- The file downloads as a spreadsheet: one row per record, your visible columns in your order.