
Vouchers
A voucher is a journal entry you write by hand: a dated, numbered document carrying two or more account lines that you balance yourself. Invoices, bills, and payments post their own entries automatically, so vouchers exist for the money movements no operational document covers - an owner's deposit, a depreciation charge, an accrual, a reclassification your accountant asks for at month end.
Menu path: Accounting > Vouchers
URL: https://my.ososs.com/dashboard/accounting-vouchers
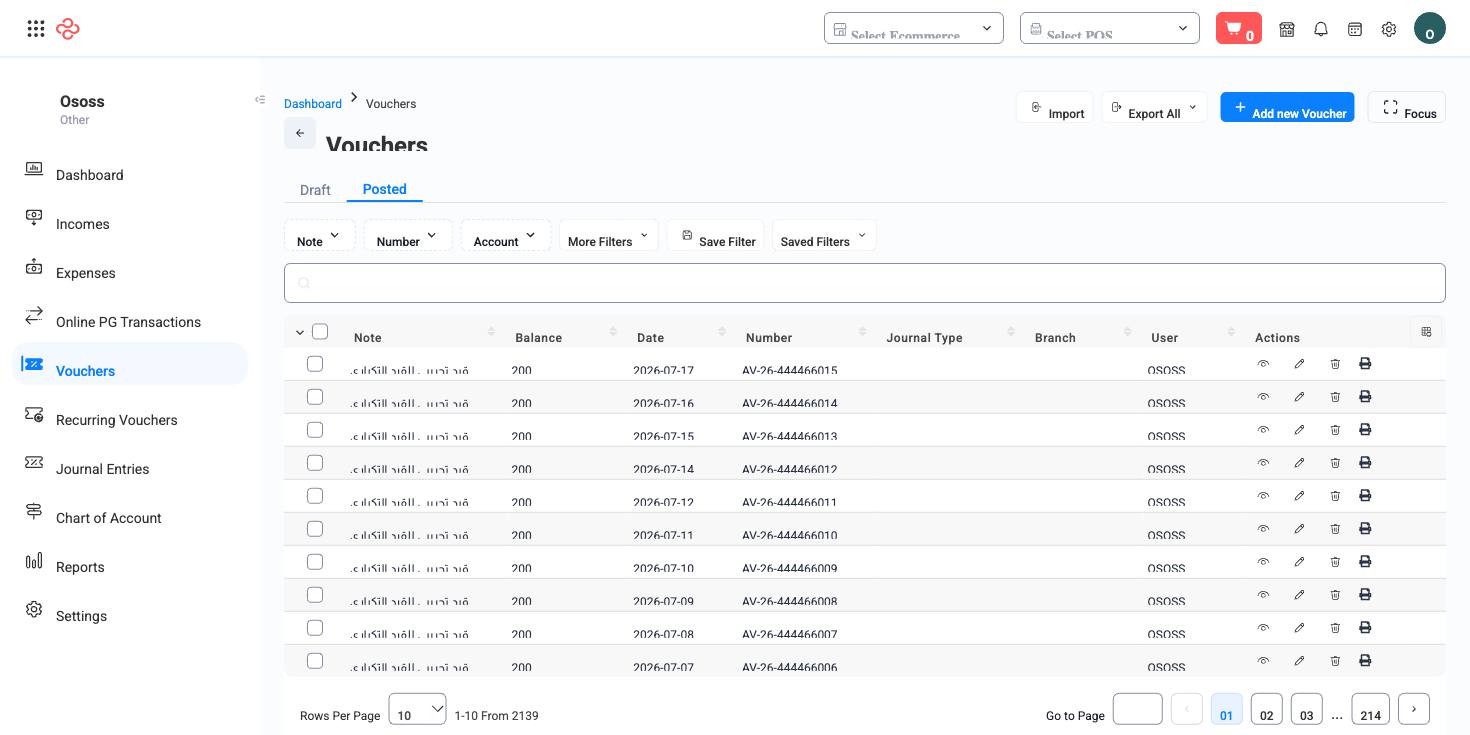
How vouchers work in OSOSS
Every voucher belongs to a journal type. The type decides which book the entry lands in and it drives the numbering: choose the type and OSOSS fetches the next free number for it. Leave the type empty and the voucher falls into the default JV journal. Numbers are unique per journal type, so a cash journal and a general journal can both run their own sequence from 1.
The body of the form is a line table. Each line takes an account, either a debit or a credit (typing in one disables the other), an optional note, and an optional cost center. Lines are draggable, so you can order them the way your accountant reads them. The footer keeps a running Debit, Credit, and Difference, and the difference stays red until the two sides agree. A voucher needs at least two lines and must balance to zero, or the save is refused.
A voucher is always in one of two states, and the list separates them into tabs:
| State | What it means | What moves it on |
|---|---|---|
| Draft | Prepared but not part of your books. Absent from Journal Entries and from every report. | The tick button in the row, if you hold the accept-draft permission |
| Posted | Live double-entry: in the journal, in account balances, in the trial balance. | Nothing - a posted voucher is only removed by deleting it |
Drafts are a separate permission from ordinary creation: a user who may only prepare drafts sees the create button on the Draft tab and nothing on Posted, which is how many teams split data entry from approval. Vouchers are stored in your company currency and are scoped to a branch when you set one.
Before you start
You need accounts in the Chart of Accounts to post to, and your journal types defined so the voucher lands in the right book. If you run Fiscal Years, the date must fall in a period that is still open - a date inside a closed period is rejected on save.
Write a voucher
- Open the Posted tab (or Draft if someone else approves your work) and click the create button.
- Choose the Journal type and wait for the Number field to finish loading.
- Set the Date, pick a Branch if the entry belongs to one, and write the Note. The note is required and becomes the entry's description everywhere it is listed.
- Click Add account at the foot of the line table, pick an account, then fill either its debit or its credit. Add a cost center on the line if you track one.
- Repeat until Difference reads 0.
- Save. You land on the voucher's own page, where the print link produces the signed document.
Common cases
The Import button on the create form reads a file of lines and drops them straight into the table, where you can still edit them before saving - a large year-end adjustment is far quicker that way. For a charge that repeats on a schedule, build it once under Recurring Vouchers instead.
Full reference
Every option and control on this page, at a glance.
Filters (9)
- Identity and numbering: Account ID, Branch ID, Cost center ID, Journal type ID, Number
- Dates and periods: From date, To date
- Status and flags: Status
- Other: Note
Form fields (15)
Branch ID, Date, Journal type ID, Lines, Lines, Note, Number, Recurring - day name, Recurring - day number, Recurring - end type, Recurring - end value date, Recurring - end value number, Recurring - first item date, Recurring - month number, Recurring - repeat type
Standard list tools
Every list page in OSOSS shares these controls:
- Manage columns - the icon at the right edge of the header row: search columns, tick to show or hide, drag to reorder. Your selection persists for your user.
- Quick search - matches the page's primary field.
- Filter chips + More Filters - the chips are your defaults; More Filters exposes the full set below.
- Save Filter / Saved Filters - name a filter combination and recall it in one click; one can be your default view.
- Reset - clears filters back to defaults.
- Export All - downloads the current filtered rows with exactly the columns you have selected.
- Focus - hides the surrounding chrome for a full-width table.
- Row selection - the header checkbox selects the page or all matching rows, enabling bulk actions.
- Rows per page and page jumper - at the foot of the table.
- Custom fields - anything you define under Settings > Custom Fields appears here as both a column and a filter.
Related pages
- Journal Entries - see the posted result of every voucher
- Journal Types - define the books and numbering sequences
- Chart of Accounts - the accounts your lines can point at
What you can do on this page
Every action on this page, step by step. What you see depends on your role, so a control your account is not set up for simply does not appear.
Add a record
- Click Add above the table - some pages label it New or show a + icon.
- Complete the form. Required fields carry a red asterisk and the form will not submit until they are filled.
- Click Save. Validation runs on submit; any field that fails shows its message directly beneath itself, and the form scrolls to the first problem.
- You land back on the list with the new record in place.
Fields on this form: Branch ID, Date, Journal type ID, Lines, Lines, Note, Number, Recurring - day name, Recurring - day number, Recurring - end type, Recurring - end value date, Recurring - end value number, Recurring - first item date, Recurring - month number, Recurring - repeat type
Edit a record
- Open the row's actions menu at the end of the row and choose Edit, or open the record and use Edit there.
- The form loads with current values. Change only what you need.
- Click Save.
Open and read a record
- Click the row, or choose View in the row's actions menu.
- The detail page shows the record's own fields, its related documents, and the actions that apply to it in its current state.
- Use the breadcrumb or your browser's back button to return - your filters, sort, and page position are preserved.
Delete a record
- Open the row's actions menu and choose Delete.
- Confirm in the dialog. There is no undo from the interface.
- If the record is referenced elsewhere - used on a document, tied to a transaction - the delete is refused and the reason shown.
Export the list
- Filter and choose your columns first - the export mirrors exactly what is on screen, not the whole table.
- Click Export All.
- The file downloads as a spreadsheet: one row per record, your visible columns in your order.
Import records
- Click Import.
- Download the template if one is offered - its headers are exactly what the importer expects.
- Fill the template, upload it, then map each of your columns to an OSOSS field.
- Read the validation result: every failing row is listed with its reason. Fix the source and re-upload, or import only the passing rows.
- Confirm. Nothing is written to your account before this step.
Print or save as PDF
- Choose Print in the row's actions menu, or open the record and use Print there.
- Pick the template or format if you are prompted.
- Your browser's print dialog opens - print it, or choose Save as PDF as the destination.