
Chart of Accounts
The chart of accounts is the tree every number in OSOSS eventually lands in. Assets, liabilities, equity, income, and expenses sit as branches; the accounts you post to hang off them as leaves. Its shape decides what your balance sheet and profit and loss statement can tell you, which is why it is worth an hour of thought before you record your first month.
Menu path: Accounting > Chart of Accounts
URL: https://my.ososs.com/dashboard/chart-accounts
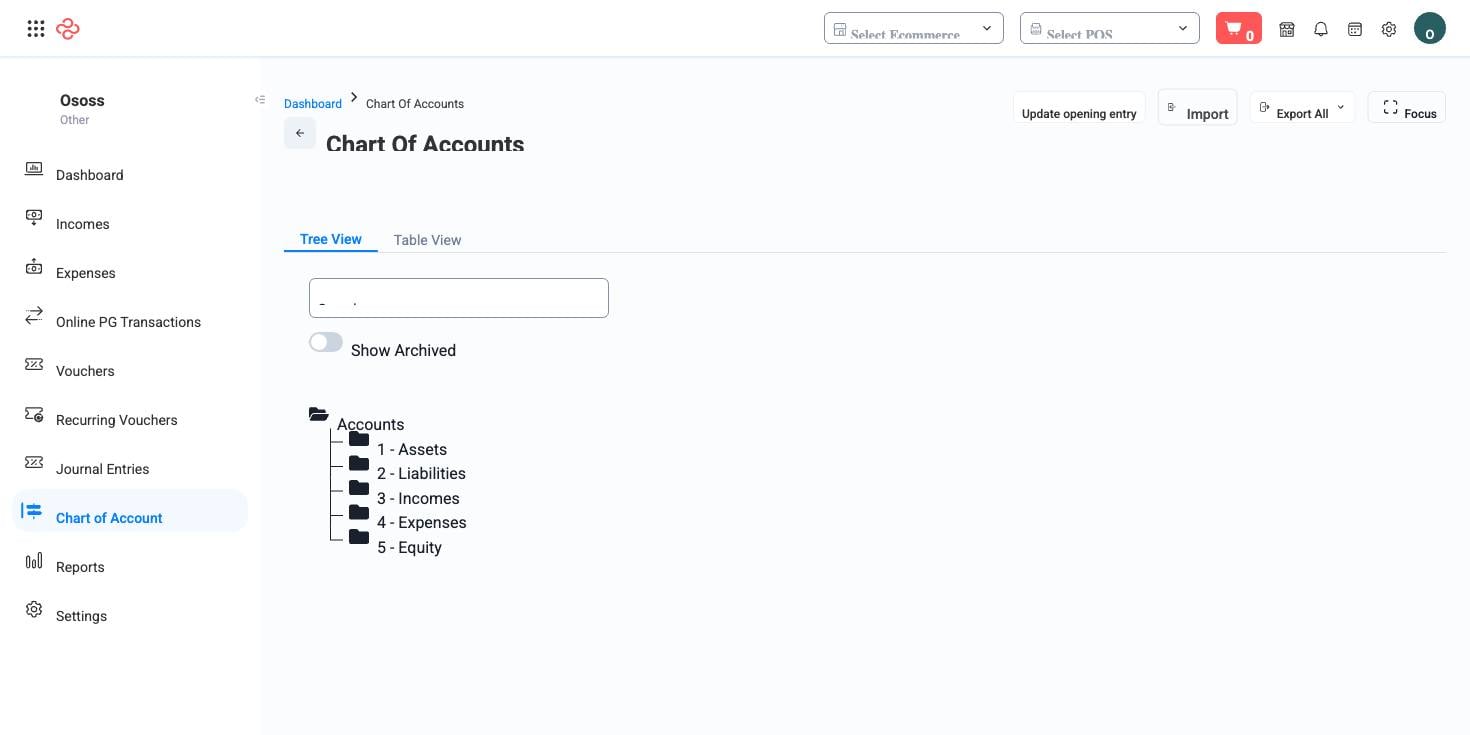
How the chart works in OSOSS
OSOSS ships a standard chart already wired into the rest of the product. The accounts it depends on - cash, banks, debtors, creditors, inventory, cost of goods sold - are marked static and carry a padlock in the tree. You can rename a static account and add children under it, but you cannot archive it, because posting logic elsewhere points at it by name.
The page offers two ways in. Tree View shows the hierarchy: folders open and close, a leaf is a postable account, and the + at the bottom of an open folder adds a child in place. Table View shows the same accounts as a flat, filterable list with name, parent, level, and number. A Show archived switch and a search box sit above the tree, and searching expands matches automatically so you can see where a hit lives.
Two settings on each account do more work than their names suggest:
| Field | What it controls |
|---|---|
| Type | Whether the account normally carries a debit balance, a credit balance, or either. It guides validation and how balances are presented. |
| Final account | Which statement the account rolls up into - Trading, Profit & Loss, or Balance Sheet. Get this wrong and the account's figures appear in the wrong report. |
Numbering is generated for you. When you add a child, OSOSS proposes the next number under that parent. If you later move an account to a different parent, it offers to regenerate the number to match the new branch, or to Keep current if your external accountant relies on the old code. Display name and Description are bilingual, so reports print in whichever language the reader is using.
Before you start
Nothing needs to exist first, but decide who owns the chart. In practice one person - usually the accountant - should approve additions, because every operational setting that points at an account is only as good as the account it points at.
Add an account
- In Tree View, open the folder the account belongs under and click +, or use the + action on a row in Table View.
- Check the proposed Account number, then enter the Display name in both languages.
- Set Type and Final account. These two decide how the account behaves in reports.
- Add a Description if the account's boundaries are not obvious from its name.
- Save. The account becomes selectable everywhere accounts are chosen.
How other pages use your accounts
Account pickers elsewhere are filtered, not free. The payment source on an Expense offers only cash, bank, credit card, and owner contribution accounts; the expense Category offers only expense and liability accounts; a product's Accounting tab draws its income account from income, its expense account from cost of goods sold, and its asset account from inventory. That is why an account created in the wrong branch of the tree seems to "not appear" - it exists, but not in the group that picker reads.
Full reference
Every option and control on this page, at a glance.
Filters (5)
- Identity and numbering: Account number, ID, Number, Parent ID
- Other: Name
Form fields (8)
Account ID, Account number, Archived, Description, Display name, Final account, Main account, Type
Standard list tools
Every list page in OSOSS shares these controls:
- Manage columns - the icon at the right edge of the header row: search columns, tick to show or hide, drag to reorder. Your selection persists for your user.
- Quick search - matches the page's primary field.
- Filter chips + More Filters - the chips are your defaults; More Filters exposes the full set below.
- Save Filter / Saved Filters - name a filter combination and recall it in one click; one can be your default view.
- Reset - clears filters back to defaults.
- Export All - downloads the current filtered rows with exactly the columns you have selected.
- Focus - hides the surrounding chrome for a full-width table.
- Row selection - the header checkbox selects the page or all matching rows, enabling bulk actions.
- Rows per page and page jumper - at the foot of the table.
- Custom fields - anything you define under Settings > Custom Fields appears here as both a column and a filter.
Related pages
- Opening Entry - load your starting balances once the tree is built
- Journal Entries - trace what actually posted to an account
- Cost Centers - the second dimension you can slice postings by
What you can do on this page
Every action on this page, step by step. What you see depends on your role, so a control your account is not set up for simply does not appear.
Add a record
- Click Add above the table - some pages label it New or show a + icon.
- Complete the form. Required fields carry a red asterisk and the form will not submit until they are filled.
- Click Save. Validation runs on submit; any field that fails shows its message directly beneath itself, and the form scrolls to the first problem.
- You land back on the list with the new record in place.
Fields on this form: Account ID, Account number, Archived, Description, Display name, Final account, Main account, Type
Edit a record
- Open the row's actions menu at the end of the row and choose Edit, or open the record and use Edit there.
- The form loads with current values. Change only what you need.
- Click Save.
Delete a record
- Open the row's actions menu and choose Delete.
- Confirm in the dialog. There is no undo from the interface.
- If the record is referenced elsewhere - used on a document, tied to a transaction - the delete is refused and the reason shown.
Export the list
- Filter and choose your columns first - the export mirrors exactly what is on screen, not the whole table.
- Click Export All.
- The file downloads as a spreadsheet: one row per record, your visible columns in your order.
Import records
- Click Import.
- Download the template if one is offered - its headers are exactly what the importer expects.
- Fill the template, upload it, then map each of your columns to an OSOSS field.
- Read the validation result: every failing row is listed with its reason. Fix the source and re-upload, or import only the passing rows.
- Confirm. Nothing is written to your account before this step.
Print or save as PDF
- Choose Print in the row's actions menu, or open the record and use Print there.
- Pick the template or format if you are prompted.
- Your browser's print dialog opens - print it, or choose Save as PDF as the destination.