
Cost Centers
A cost center is the second dimension of your books. The account tells you what a transaction was - rent, salaries, fuel. The cost center tells you which part of the business it belonged to - a branch, a department, a delivery fleet, a seasonal project. With both in place you can answer "how much did the fleet cost us this quarter?" without maintaining a parallel spreadsheet.
Menu path: Accounting > Cost Centers
URL: https://my.ososs.com/dashboard/cost-centers
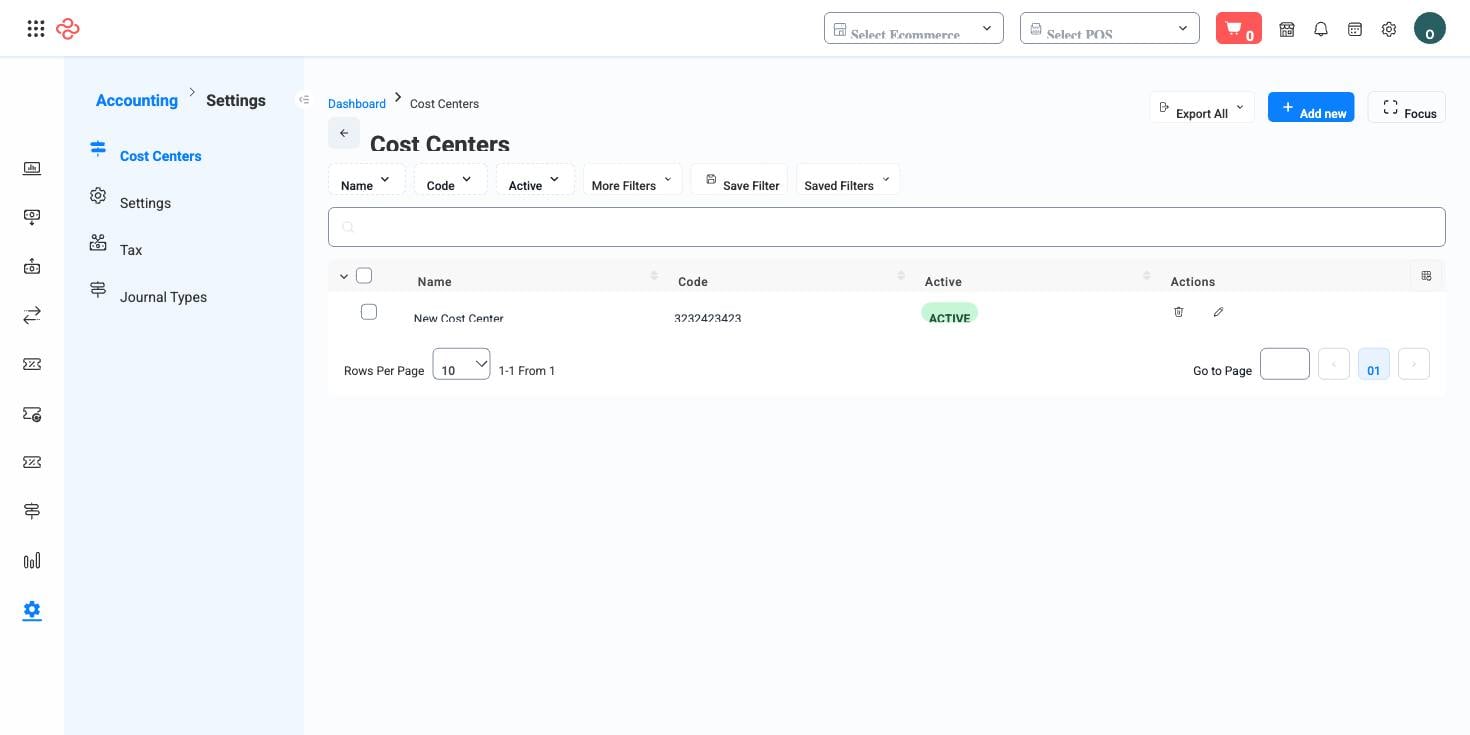
How cost centers work in OSOSS
A cost center is a small record: a Name, a Code, and an Active switch. Both the name and the code are required, and the code is what you will look for in exports and in your accountant's working papers, so keep it short and stable.
Once saved, the cost center appears as an optional field on the records that spend or receive money:
| Where it appears | How it is used |
|---|---|
| Incomes and Expenses | One cost center per record, chosen on the main section of the form |
| Voucher lines | Per line, so a single voucher can be split across several centers |
| Journal Entries and voucher lists | As a filter, and on the entry detail as a column beside each account |
Because it sits on the individual journal line rather than on the document, a cost center is a genuine reporting axis: a rent voucher for three branches can carry three lines with three different centers, and each branch is charged its share.
Cost centers are independent of branches. A branch restricts who can see and post a record; a cost center only labels it. Many companies start by mirroring their branches one-for-one, then add finer centers - a project, a vehicle, a marketing campaign - as questions come up.
Before you start
Nothing has to exist first. It does help to agree on the coding scheme before you create the first record, because renaming a center is easy but re-tagging six months of postings is not.
Create a cost center
- Click the create button on the list.
- Enter the Name and a Code. Both are required.
- Leave Status switched on so the center is selectable, or switch it off to keep it out of the pickers.
- Save.
Editing and retiring
Editing happens in place: the pencil action on a row opens the form in a side drawer, so you never lose your position in the list. There is no delete on this page. To retire a center, edit it and turn Status off - it disappears from every picker while every entry that already carries it keeps reporting correctly. Retiring rather than deleting is deliberate: a deleted center would leave old journal lines pointing at nothing.
Reading the list
The list shows name, code, and a green Active or red Inactive badge, and it filters on all three. Where cost centers earn their keep, though, is on the pages that consume them - filter Journal Entries by cost center and date range and you have a per-unit expense statement without building a report.
Full reference
Every option and control on this page, at a glance.
Filters (3)
- Identity and numbering: Code
- Status and flags: Active
- Other: Name
Form fields (3)
Active, Code, Name
Standard list tools
Every list page in OSOSS shares these controls:
- Manage columns - the icon at the right edge of the header row: search columns, tick to show or hide, drag to reorder. Your selection persists for your user.
- Quick search - matches the page's primary field.
- Filter chips + More Filters - the chips are your defaults; More Filters exposes the full set below.
- Save Filter / Saved Filters - name a filter combination and recall it in one click; one can be your default view.
- Reset - clears filters back to defaults.
- Export All - downloads the current filtered rows with exactly the columns you have selected.
- Focus - hides the surrounding chrome for a full-width table.
- Row selection - the header checkbox selects the page or all matching rows, enabling bulk actions.
- Rows per page and page jumper - at the foot of the table.
- Custom fields - anything you define under Settings > Custom Fields appears here as both a column and a filter.
Related pages
- Expenses - the page where cost centers get used most
- Vouchers - split a single entry across several centers
- Reports - where the tagged figures come back out
What you can do on this page
Every action on this page, step by step. What you see depends on your role, so a control your account is not set up for simply does not appear.
Add a record
- Click Add above the table - some pages label it New or show a + icon.
- Complete the form. Required fields carry a red asterisk and the form will not submit until they are filled.
- Click Save. Validation runs on submit; any field that fails shows its message directly beneath itself, and the form scrolls to the first problem.
- You land back on the list with the new record in place.
Fields on this form: Active, Code, Name
Edit a record
- Open the row's actions menu at the end of the row and choose Edit, or open the record and use Edit there.
- The form loads with current values. Change only what you need.
- Click Save.
Export the list
- Filter and choose your columns first - the export mirrors exactly what is on screen, not the whole table.
- Click Export All.
- The file downloads as a spreadsheet: one row per record, your visible columns in your order.