
Expenses
An expense records money leaving the business outside the purchase invoice cycle: fuel, government fees, a cash salary payment, a repair paid on the spot. It is a one-screen document - amount, date, where the money came from, what it was for - and it posts a real double-entry the moment it is accepted, which is why it sits in Accounting rather than in Purchases.
Menu path: Accounting > Expenses
URL: https://my.ososs.com/dashboard/expenses
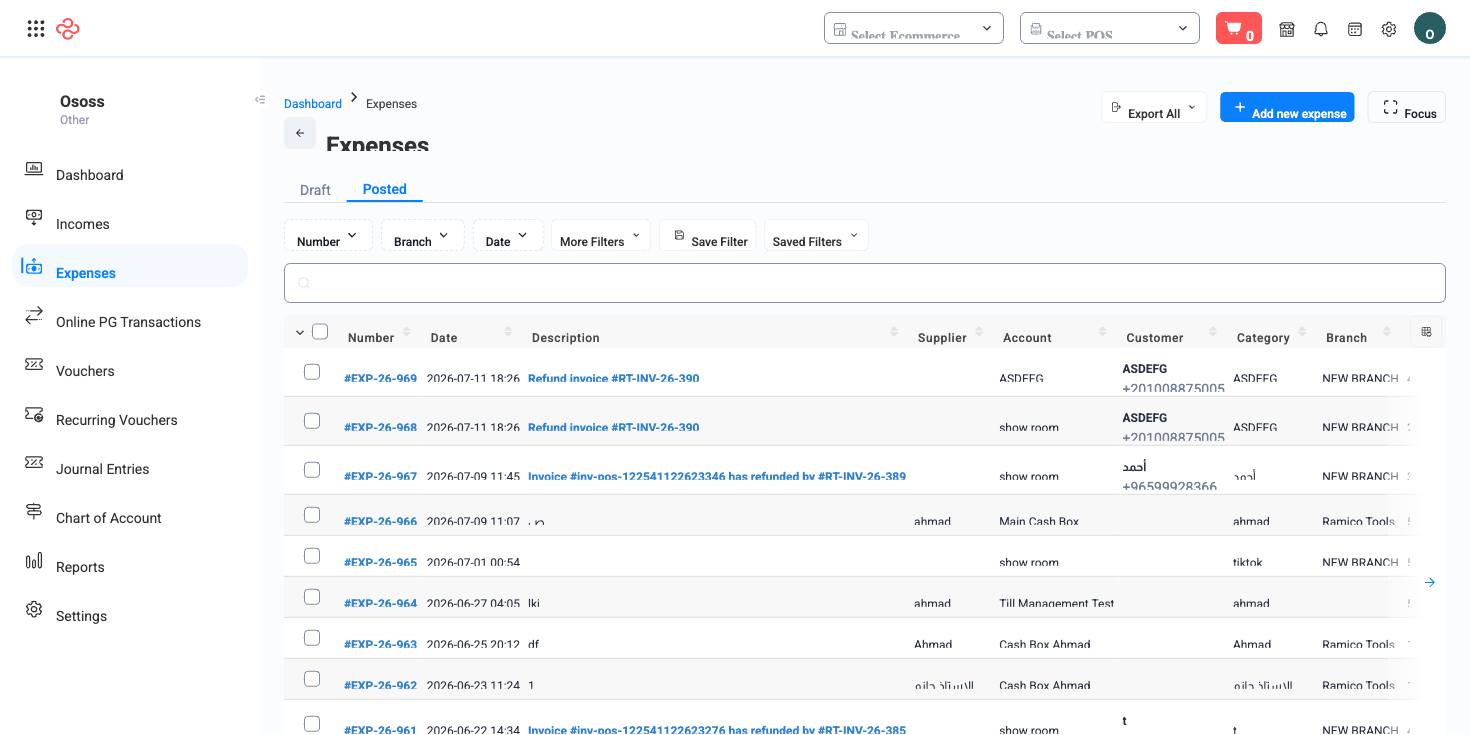
How expenses work in OSOSS
Every expense names two accounts, and telling them apart is the whole skill. The Account is where the money came from - a cash box, a bank account, a credit card, an owner contribution; the picker only offers those. The Category is what the money was for, drawn from your expense and liability accounts. The posting debits the category and credits the source, so a wrong category quietly lands the cost in the wrong line of your profit and loss statement.
Like incomes and vouchers, expenses have two states, shown as tabs on the list:
| State | Effect on your books | Who moves it |
|---|---|---|
| Draft | None. Not in Journal Entries, not in reports, not in the account balance. | A user with the accept-draft permission, using the tick in the row |
| Posted | Fully posted. Debit and credit are live and the amount appears in every expense report. | Nobody - posted is final |
The Payment method you pick is a gateway, and choosing the cheque gateway reveals cheque number, cheque date, and bank name - the fields that feed the cheque register. Branch scopes the record, Cost center is the reporting tag, and receipts attach in the Attachments section.
Before you start
You need an account tree with the source and category accounts you expect to use, and your gateways configured under Payment Methods. If you plan to tag spend by unit, create your Cost Centers first - retro-tagging is manual work.
Record an expense
- Click the create button on the Posted tab, or on Draft if your role prepares entries for approval.
- Fill Description, Date (with time), and Amount in your company currency.
- Choose the Payment method, completing the cheque fields if you paid by cheque.
- Choose the Account the money left, then the Category it belongs to, plus a Cost center and Branch if you use them.
- Attach the receipt, then Save. From the record's page you can print it as a payment document.
Settling supplier bills from an expense
When one payment clears several supplier bills, turn on the supplier settlement switch instead of entering separate expenses. Choose the vendor and the section lists that vendor's open bills in your company currency. Tick the bills, then either type each allocation or click Distribute FIFO to fill the oldest bills first until the payment is used up. A badge tracks the result: unallocated, partially allocated, fully allocated, or over allocated - and an over-allocated expense will not save.
Reading the list
Six summary widgets sit above the table - transaction count, total, average, highest, refunded amount, and net expenses - and they recalculate against whatever filters you have applied. The list opens on the last 30 days by default; widen the date range before you conclude that spend has dropped. The 15 default columns include both the debit and credit account, which makes a mis-categorised expense visible without opening it.
Full reference
Every option and control on this page, at a glance.
List columns
Shown by default: Number, Date, Description, Vendor, Customer, Category, Branch, Debit account, Credit account, Amount, Reference number, Payment method, Payment ID, Status, Created by
Form fields (12)
Account ID, Amount, Branch ID, Category ID, Cheque bank name, Cheque date, Cheque number, Cost center ID, Date, Description, Gateway ID, Note
Standard list tools
Every list page in OSOSS shares these controls:
- Manage columns - the icon at the right edge of the header row: search columns, tick to show or hide, drag to reorder. Your selection persists for your user.
- Quick search - matches the page's primary field.
- Filter chips + More Filters - the chips are your defaults; More Filters exposes the full set below.
- Save Filter / Saved Filters - name a filter combination and recall it in one click; one can be your default view.
- Reset - clears filters back to defaults.
- Export All - downloads the current filtered rows with exactly the columns you have selected.
- Focus - hides the surrounding chrome for a full-width table.
- Row selection - the header checkbox selects the page or all matching rows, enabling bulk actions.
- Rows per page and page jumper - at the foot of the table.
- Custom fields - anything you define under Settings > Custom Fields appears here as both a column and a filter.
Related pages
- Incomes - the mirror page for money coming in
- Vendors - whose bills the settlement section clears
- Chart of Accounts - why a picker shows only certain accounts
What you can do on this page
Every action on this page, step by step. What you see depends on your role, so a control your account is not set up for simply does not appear.
Add a record
- Click Add above the table - some pages label it New or show a + icon.
- Complete the form. Required fields carry a red asterisk and the form will not submit until they are filled.
- Click Save. Validation runs on submit; any field that fails shows its message directly beneath itself, and the form scrolls to the first problem.
- You land back on the list with the new record in place.
Fields on this form: Account ID, Amount, Branch ID, Category ID, Cheque bank name, Cheque date, Cheque number, Cost center ID, Date, Description, Gateway ID, Note
Edit a record
- Open the row's actions menu at the end of the row and choose Edit, or open the record and use Edit there.
- The form loads with current values. Change only what you need.
- Click Save.
Open and read a record
- Click the row, or choose View in the row's actions menu.
- The detail page shows the record's own fields, its related documents, and the actions that apply to it in its current state.
- Use the breadcrumb or your browser's back button to return - your filters, sort, and page position are preserved.
Export the list
- Filter and choose your columns first - the export mirrors exactly what is on screen, not the whole table.
- Click Export All.
- The file downloads as a spreadsheet: one row per record, your visible columns in your order.
Print or save as PDF
- Choose Print in the row's actions menu, or open the record and use Print there.
- Pick the template or format if you are prompted.
- Your browser's print dialog opens - print it, or choose Save as PDF as the destination.