
Recurring Vouchers
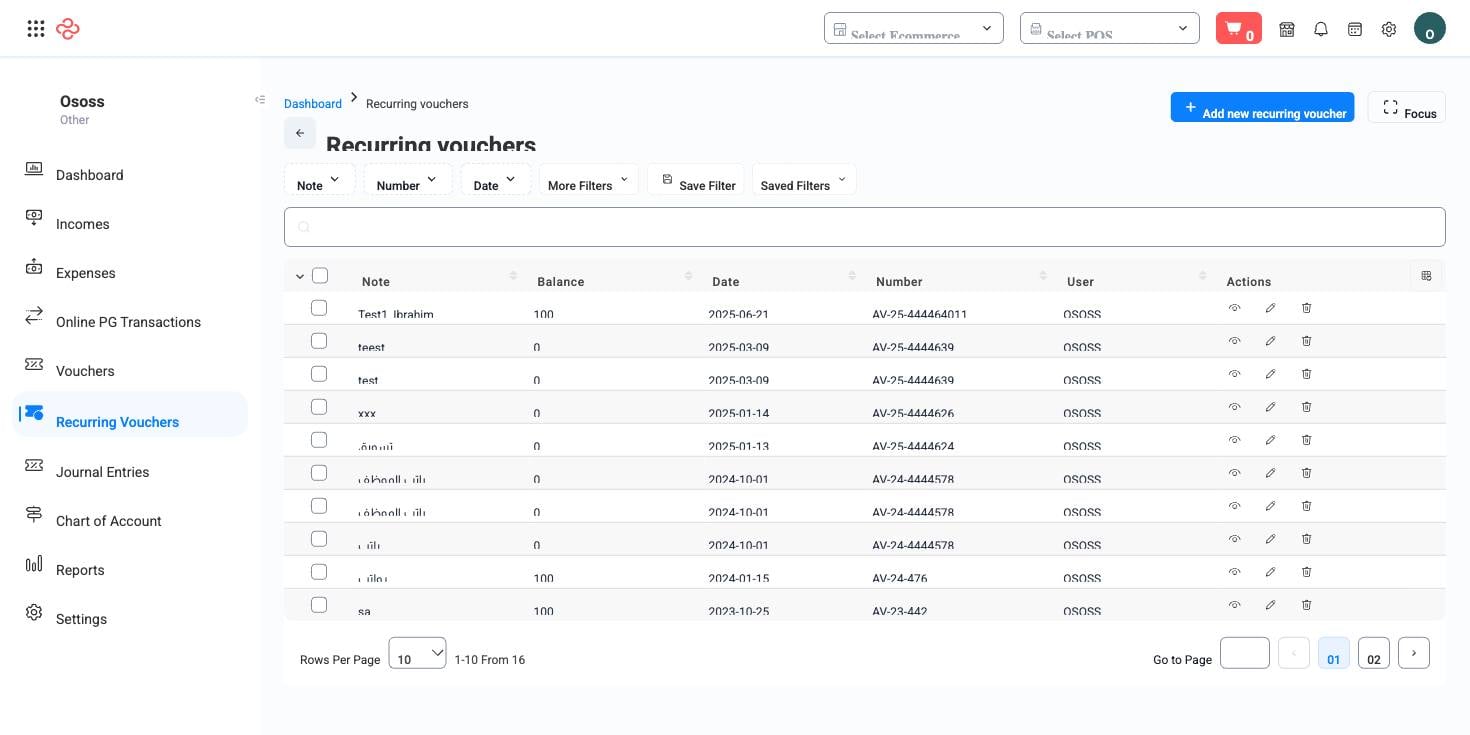
A recurring voucher is a template plus a schedule. You build the voucher once - accounts, amounts, branch, journal type - tell OSOSS how often it should repeat and when to stop, and the system posts a real voucher on every due date without anyone opening the page. It is for the money movements that never change: monthly rent, a fixed salary transfer, a standing bank charge, a regular float move between tills.
Menu path: Accounting > Recurring Vouchers
URL: https://my.ososs.com/dashboard/recurring-accounting-vouchers
How recurring vouchers work in OSOSS
A recurring voucher is a normal accounting voucher marked as recurring, with a schedule attached. It is created with status accepted in the company currency and it must balance - debit and credit totals equal - or the save is rolled back with "The accounting voucher is incorrect".
The schedule you attach controls the generated occurrences:
| Repeat | What you also set |
|---|---|
| Daily | Nothing else - one voucher a day. |
| Weekly | Day name - which weekday it falls on. |
| Monthly | Day number - 1 to 30. |
| Yearly | Month number and Day number. |
First item date starts the series. End type closes it: Never runs indefinitely, On stops at a date you pick, After stops once a set number of items has been generated. If the first item date happens to be today, the first voucher is generated the moment you save - do not be surprised to see it appear straight away.
Occurrences are ordinary vouchers. Each gets its own number, posts to the accounts on the template, and shows up in the ledger, the trial balance and account statements exactly like a hand-typed one. The Notification Center announces creation, editing and deletion of the recurring voucher itself under accounting vouchers.
Before you start
You need a journal type for the voucher, the accounts it will hit, and an open fiscal year. The date and the whole recurring schedule are validated against closed fiscal periods, so a series that would post into a closed period is rejected on save, not silently skipped later.
Set up a recurring voucher
- Go to Accounting > Recurring Vouchers and click Add.
- Choose the Journal type - the voucher Number is generated from it, so pick it before touching the number.
- Set the Date, the Branch, and a Note describing the series, such as "Warehouse rent - monthly".
- In the recurring block, choose Repeat type and its follow-up field, then First item date and End type.
- Click Add account below the lines table and add at least two lines. Enter Debit on one side and Credit on the other, with an optional note and cost centre per line.
- Check the Difference total under the table reads zero, then click Save.
Reading the list
The list shows note, balance, date, number and the user who created it, scoped to the branches you can see. Filter by date range, number, account or user to find a series. Where you have view permission, the print icon at the end of the row opens the printable voucher in a new tab. Open a record to see its lines together with the occurrences the schedule has already generated.
Full reference
Every option and control on this page, at a glance.
Filters (4)
- Identity and numbering: Number
- Dates and periods: From date, To date
- Other: Note
Standard list tools
Every list page in OSOSS shares these controls:
- Manage columns - the icon at the right edge of the header row: search columns, tick to show or hide, drag to reorder. Your selection persists for your user.
- Quick search - matches the page's primary field.
- Filter chips + More Filters - the chips are your defaults; More Filters exposes the full set below.
- Save Filter / Saved Filters - name a filter combination and recall it in one click; one can be your default view.
- Reset - clears filters back to defaults.
- Export All - downloads the current filtered rows with exactly the columns you have selected.
- Focus - hides the surrounding chrome for a full-width table.
- Row selection - the header checkbox selects the page or all matching rows, enabling bulk actions.
- Rows per page and page jumper - at the foot of the table.
- Custom fields - anything you define under Settings > Custom Fields appears here as both a column and a filter.
Related pages
- Accounting Vouchers - where the generated occurrences appear
- Journal Types - the numbering series each voucher draws from
- Journal Entries - for reversing an occurrence that should not have posted
What you can do on this page
Every action on this page, step by step. What you see depends on your role, so a control your account is not set up for simply does not appear.
Add a record
- Click Add above the table - some pages label it New or show a + icon.
- Complete the form. Required fields carry a red asterisk and the form will not submit until they are filled.
- Click Save. Validation runs on submit; any field that fails shows its message directly beneath itself, and the form scrolls to the first problem.
- You land back on the list with the new record in place.
Edit a record
- Open the row's actions menu at the end of the row and choose Edit, or open the record and use Edit there.
- The form loads with current values. Change only what you need.
- Click Save.
Open and read a record
- Click the row, or choose View in the row's actions menu.
- The detail page shows the record's own fields, its related documents, and the actions that apply to it in its current state.
- Use the breadcrumb or your browser's back button to return - your filters, sort, and page position are preserved.
Export the list
- Filter and choose your columns first - the export mirrors exactly what is on screen, not the whole table.
- Click Export All.
- The file downloads as a spreadsheet: one row per record, your visible columns in your order.
Print or save as PDF
- Choose Print in the row's actions menu, or open the record and use Print there.
- Pick the template or format if you are prompted.
- Your browser's print dialog opens - print it, or choose Save as PDF as the destination.