
Stores
A store is an online storefront. Most businesses run one, but OSOSS supports several from the same catalog and stock - a retail shop and a wholesale portal, an Arabic-first brand and an English one, or a separate front for a sub-brand.
Menu path: Website > Stores
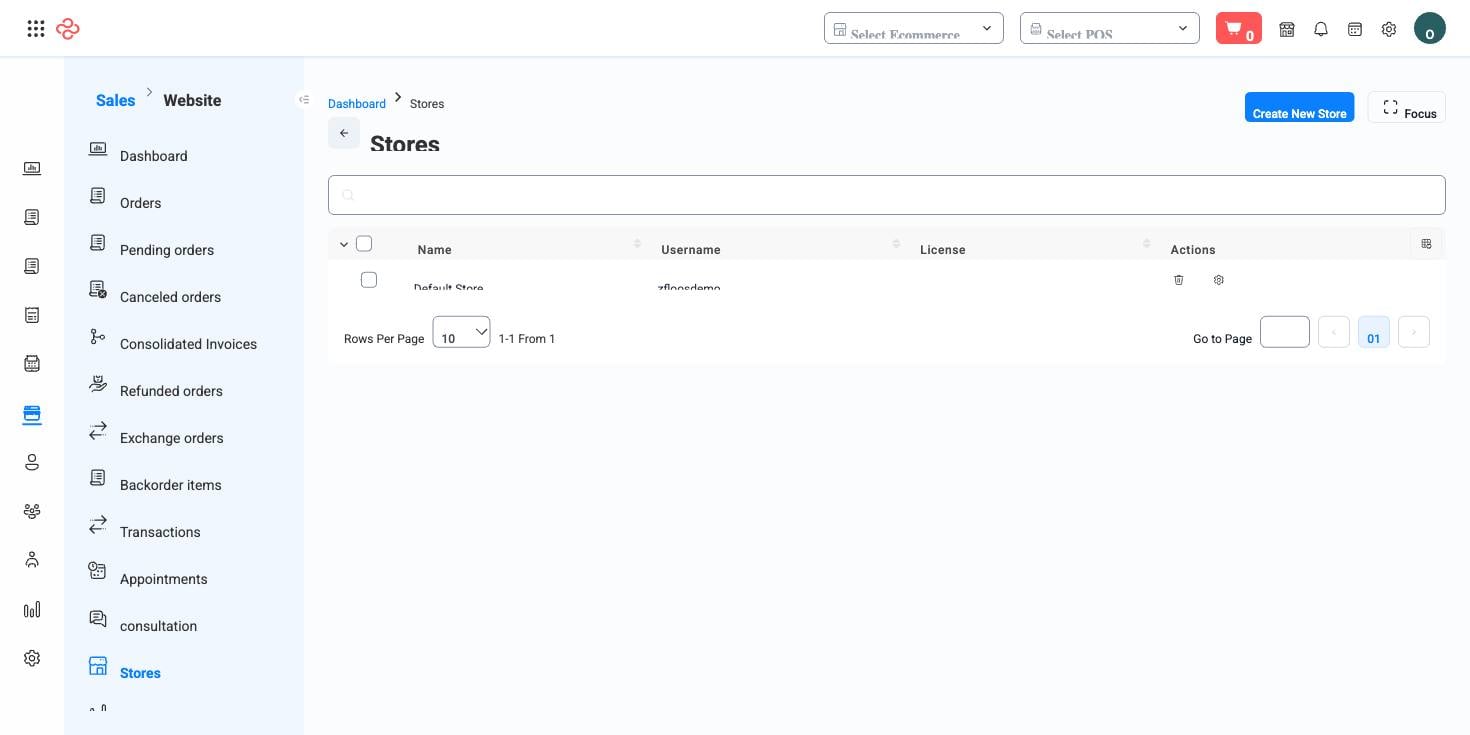
Screenshot from the live OSOSS Dashboard
What a store record defines
| Field | Purpose |
|---|---|
| Name | The storefront's name, shown to customers |
| Username | The store's identifier, used in its default address |
| Licence | The licence the storefront runs under |
| Base currency | The currency prices are displayed and charged in by default |
| Supported currencies | The other currencies a shopper may switch to |
Everything else about the shopper's experience is built on top: Inner Pages for content, Domain for its address, Coupons and Cart Rules for promotions, and Product Selling Pricing if a store needs different prices from your other channels.
Set up a store
- Create the store with the name customers should see, and a username that is short and stable - it appears in the default address.
- Set the Base currency. This is what prices are quoted in, so it should be the currency your target market thinks in.
- Add Supported currencies only where you can actually settle in them. Displaying a currency you cannot accept produces abandoned checkouts at the last step.
- Point a domain at the store so customers reach it at your own address rather than the default one.
- Build the content pages, set the pricing rules if this store differs, then publish.
Note: Multiple stores share one catalog and one stock pool. That is the strength - you never reconcile two inventories - and the constraint: an item sold on either store reduces the same balance. Use visibility settings to control what each store shows.
Tip: Do not open a second store to solve a language or currency problem. Both are handled inside one store. A second store earns its keep when the audience, the pricing and the presentation all differ - a wholesale portal, for instance.
Full reference
Every option and control on this page, at a glance.
Dialogs and drawers
- Manage Store Drawer
Standard list tools
Every list page in OSOSS shares these controls:
- Manage columns - the icon at the right edge of the header row: search columns, tick to show or hide, drag to reorder. Your selection persists for your user.
- Quick search - matches the page's primary field.
- Filter chips + More Filters - the chips are your defaults; More Filters exposes the full set below.
- Save Filter / Saved Filters - name a filter combination and recall it in one click; one can be your default view.
- Reset - clears filters back to defaults.
- Export All - downloads the current filtered rows with exactly the columns you have selected.
- Focus - hides the surrounding chrome for a full-width table.
- Row selection - the header checkbox selects the page or all matching rows, enabling bulk actions.
- Rows per page and page jumper - at the foot of the table.
- Custom fields - anything you define under Settings > Custom Fields appears here as both a column and a filter.
Related pages
- Domain - the address customers use
- Inner Pages - the content pages of a store
- Product Selling Pricing - per-channel prices
What you can do on this page
Every action on this page, step by step. What you see depends on your role, so a control your account is not set up for simply does not appear.
Export the list
- Filter and choose your columns first - the export mirrors exactly what is on screen, not the whole table.
- Click Export All.
- The file downloads as a spreadsheet: one row per record, your visible columns in your order.